Register a SQL Server connection
Objective: Register SQL Server connections for easier access to connection information.
Reason for lesson: Registering a SQL Server connection lets the user save connection information for multiple connections.
Navigate: Main Menu | View | Registered Servers |
Steps to register a SQL Server connection:
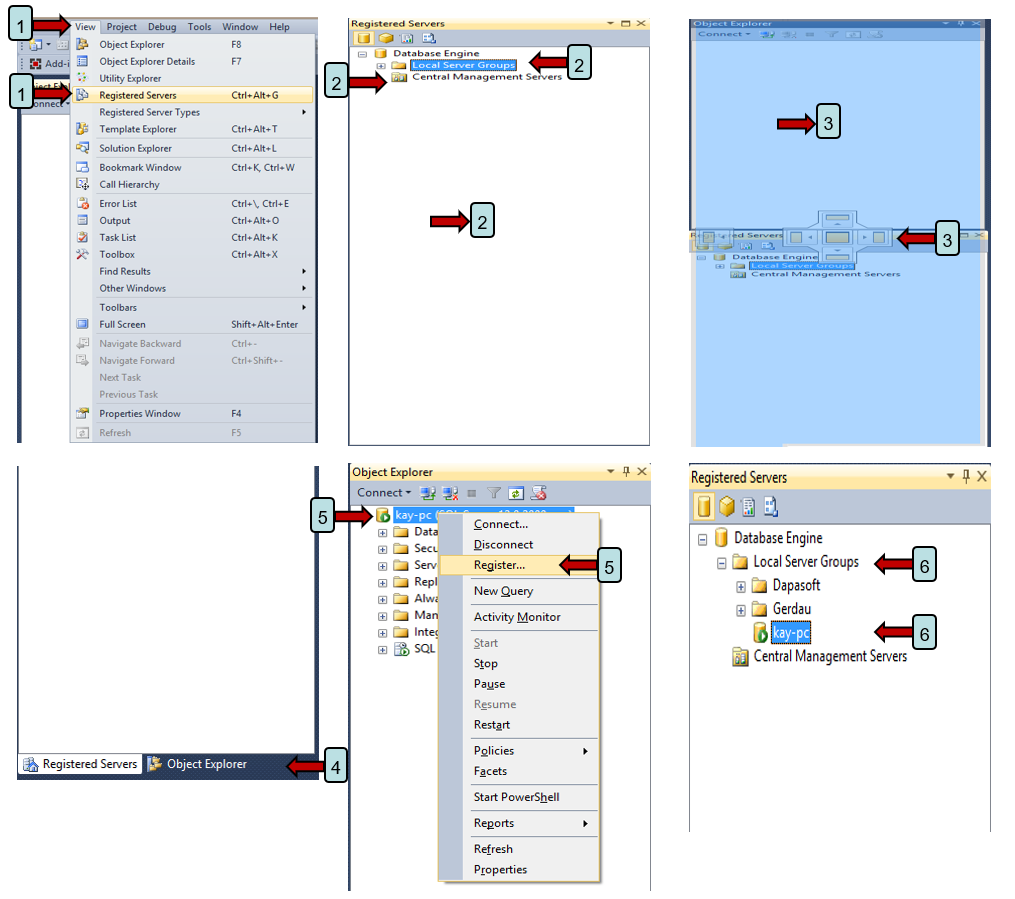
1. Click on View/Registered Servers.
2. The undocked list of registered servers will appear. There are 2 ways to register servers. One is from a central server so everyone has access and the second is locally. This OPL refers to locally registered servers.
3. To dock the registered servers with the object explorer grab the top of the registered servers with your mouse by pressing and holding the left mouse button. Now move your mouse so the top of the registered server list is in the center of the object explorer. You will see the color change to blue and a 4 point “handle” appear in the center of the object explorer. Release the left mouse button.
4. Once the Registered Servers is docked you will see at the bottom of the object explorer a tabs that will allow you to switch between the object explorer tree and the registered servers tree. You can also change the order of the tabs by pressing and holding the left mouse button.
5. To register a server you have to first connect to the server you want to register. Once you are connected go to the object explorer tree and right mouse click on the server name. In the popup menu select “Register”.
6. You server will now be registered under the “Local Server Groups”. To connect to a registered server just access the list and double click on the server name.
Return to SQL Server Management Studio
